You need really dark skies to photograph the Milky Way. Recently I’ve been so preoccupied with improving my Milky Way photography that I’ve dismissed taking photos on clear nights if the moon is out. Turns out I was missing what these beautiful, clear, moonlit nights had to show me.
A couple days after the full moon, we had a nice clear, cool night. I drove down to Rose Lake in Hocking Hills, Ohio about 2AM to experiment with moonlight landscape photography. There are other places you can go around central Ohio to photograph the night sky, but Rose Lake is my favorite. It has relatively dark skies, is not too far a drive, it’s easy to access, there’s plenty of space, and the calm, mirror flat lake is perfect for reflections.
Finding the Moon and Stars
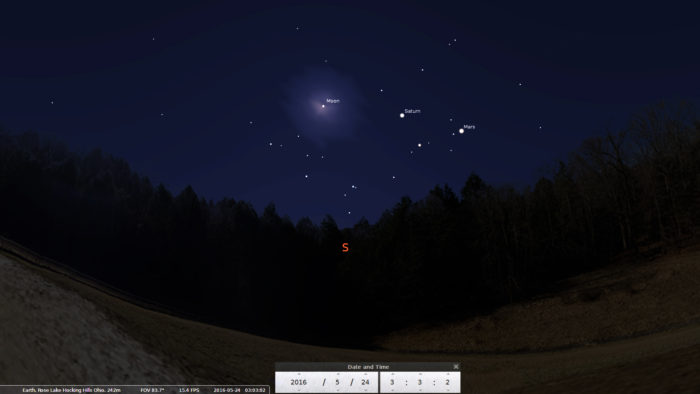
I use a free program called Stellarium to figure out where and when the moon and stars will appear on any given night. I go to Rose Lake so often, I took a 360 degree daytime panorama and made a custom landscape background for Stellarium so I can see what the sky will look like with that treeline and over the lake. By default Stellarium shows you the Milky Way at a standard brightness and limits the visible stars to magnitude 6.8. For nights with a bright moon, I turn the Milky Way brightness down to 0 and limit the stars to 3.5 for a more accurate picture.
Click images to enlarge.
All photos are copyrighted and protected by Digimarc.
Lens Heater
I’ve mentioned before that condensation is a real problem with early morning time lapse photography. This outing was my first chance to try out a new lens heater that I hoped would eliminate the problem. It worked perfectly! Despite the foggy, cool conditions and having the camera setup low, pointing upwards, and just a couple feet from the water, there wasn’t a hint of condensation on the lens or camera. The tripod was dripping wet, but the glass was dry.
Dedicated camera lens heating systems can be expensive. Kendrick Camera Cozys, for example, are a couple hundred dollars. I read about a moderately priced system on Phil Hart’s blog. It consists of a Dew Stop heater strip made for telescopes, a 12V 6000mAh lithium battery and a power cable adapter. Phil sells the unusual female RCA to male 2.5mm adapter on Amazon, but $10 for this thing seems pretty pricey. If you’re handy, he also provides instructions for making your own for a lot less. This is the whole thing assembled on my Sony a5000 with a Rokinon 12mm f/2 lens.
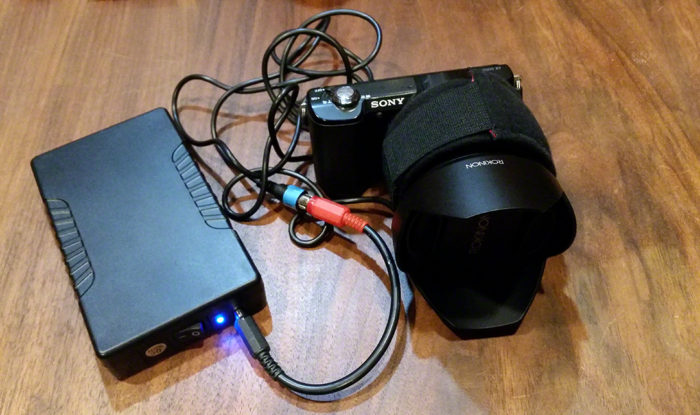
The heater strip covers the focus ring, so you have to get everything composed and focused before putting it on. Because focusing at night can be a pain, I usually setup the lens in advance by focusing to infinity during the day and putting a piece of tape on the focus ring to keep it from moving. Below are links to the three parts on Amazon. The strip I bought is a little too large because I’m an idiot and picked a length based on the 67mm filter size for my lens. Measure the diameter of the barrel of the lens you want to use – don’t go by the filter size. D’oh!
Dew Not Heater Strip – 2″ Barrel (9″ length) – $30 – http://www.amazon.com/Dew-Eyepiece-Heater-Strip-DN003/dp/B003UNR43U/
TalentCell 12V 6000mAh Rechargeable Battery – $30 – http://www.amazon.com/Talentcell-Rechargeable-6000mAh-Battery-Portable/dp/B00MF70BPU
NOTE: Heaters require a lot of electricity. If you go with a different battery, it needs to be 12V and at least 6000mAh (amp-hours) to power the Dew Stop.
Phil Hart’s Female RCA to Male 2.5mm adapter – $10 – http://www.amazon.com/Dew-Heater-Adapter-Cable/dp/B00STJD9IE
$70 isn’t exactly cheap, but it works very well and is a third the cost of some specialized camera heaters. One caveat – in the dark, the LED light on the battery is surprisingly powerful. I ended up tucking the battery into my backpack because it cast tripod shadows into frame if it was pointed at the camera and cast a reflected blue glow even if I pointed it away.
If $70 is outside your budget, a hand warmer and a rubber band will also provide a fair measure of protection from condensation. Positioning your camera high enough to point parallel to the ground or even pointed down a little can help too.
Moonlight Time Lapses
To compose a night shot I bump up the ISO to the max and disable long exposure noise reduction so I can take very quick shots and make adjustments. After composing the shot and putting the heater in place and turning it on (that’s an important step!) I did some test shots to dial in the ISO and shutter speed. Once I was happy with those, I created a new folder on the memory card and setup my intervalometer. I took 8 second exposures 2 seconds apart at ISO:640 and f/2.8 with a Rokinon 12mm f/2 lens. Infinity on this lens starts at about 3 feet. By positioning the camera a little more than 3 feet from the foreground rocks, I could have them and the rest of the scene in focus even at f/2.8.
From 3AM to 5AM the camera took about 720 shots which make up this ~30 second time lapse. They required very little post-processing. The shots were cropped to 1920×1280, rotated to straighten the horizon and adjusted for contrast. I had the White Balance in the camera set to 3550K and in LightRoom I bumped that up to 3800K. Be sure to click the little gear and choose HD for the best video quality. The music is “Moonlight Reprise” by Kai Engel from freemusicarchive.org
Stacking all of the time lapse frames together into one photo with StarStax created this calm, clear star trails shot.
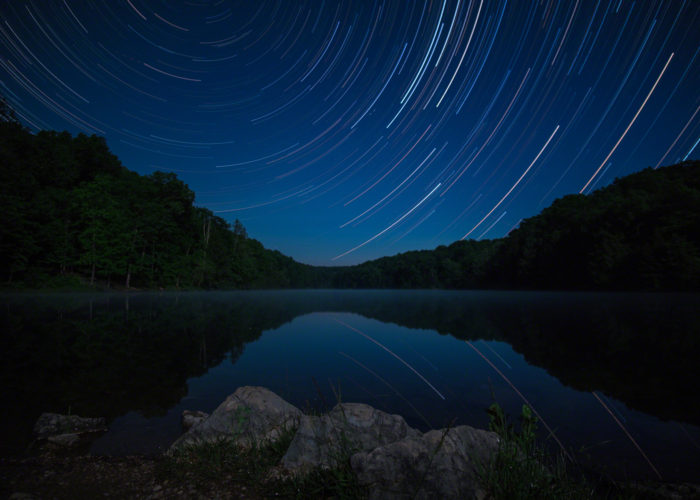
720 shots at ISO:100 – f/2.8 – 10mm – 8 sec
I centered the far tip of the lake which points slightly to the east of true north so the center of the star trails, Polaris, is to the left and above the frame.
Light Pollution Filter
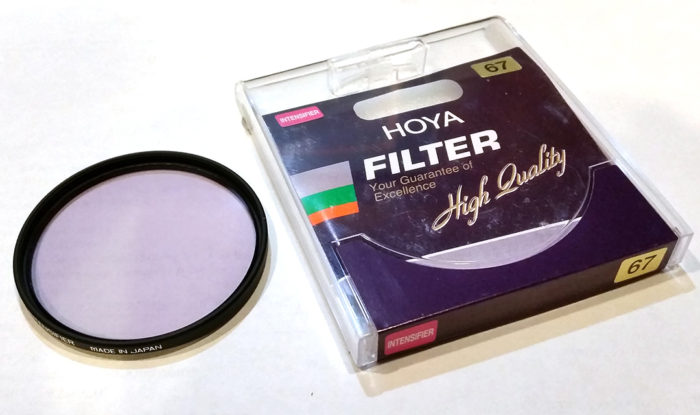
In addition to the lens heater, the other accessory I used was a Hoya “Red Intensifier” filter – also known as a ‘didymium’ filter. Despite the counter intuitive name, the filter is designed to block a narrow range of orange light. That range happens to be the same as what’s produced by sodium lights – those orangey-yellow lights that get left on all night in parking lots everywhere. Sodium lights are the biggest source of light pollution and can give night sky photos an orange cast.The filter does an amazing job of eliminating that light pollution. I find that I lose a little less than 1/3 stop of light with the filter, but the results are worth it. Other brands make Red Intensifiers, but the Hoya is the only one I’ve tried.
The Actual Moon
I’m fortunate enough to have two Sony camera bodies, an a5000 and an a3000. While the a5000 was taking a time lapse aimed at the lake, I setup the a3000 with a Rokinon 8mm f/2.8 fisheye lens facing south towards the not quite full moon.
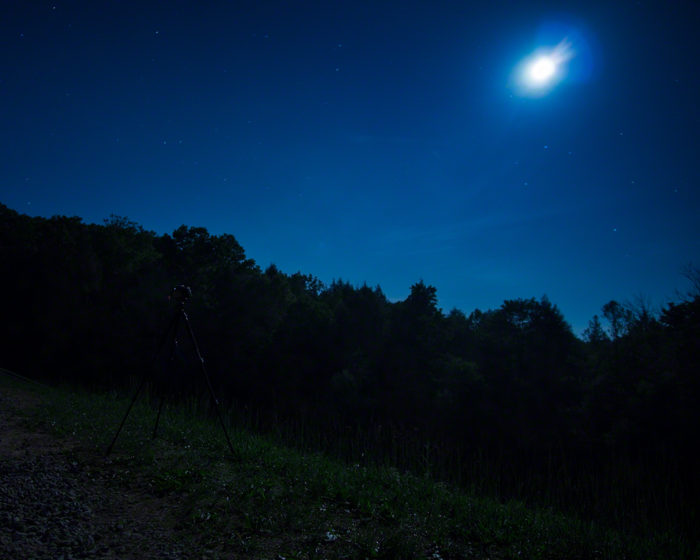
The morning I took this, the moon sat directly in front of the center of the Milky Way. As you can see in the photo above and the time lapse below, no part of the Milky Way was visible because it was completely overwhelmed by the moonlight. For this time lapse I set the camera to take continuous 10 second exposures at ISO:200 (yes, 200 at night!) and f/2.8. I just laid a hand warmer over the lens (making sure it didn’t show in the frame) to combat condensation. The white balance was set to 3600K to accentuate the moonlight. Because the moonlight is so bright, it also overwhelms most of the light pollution.
The bright reflective thing on the left is part of the sluiceway that comes out of the lake and feeds the Rose Hollow waterfall. Unfortunately I didn’t see it on the LCD while composing the time lapse. If I had setup the camera a little lower then it would have been hidden by the grass. The a3000 doesn’t have a tilting screen so setting it up really low can be a pain. Otherwise I’m pretty happy with how both time lapses turned out. The light morning mist drifting across the water and by the trees was a nice unexpected bonus.
Music is “Starling” by Podington Bear from freemusicarchive.org.
Standing around alone in the semi-darkness for a couple hours with no cell service can be a bit tedious. My wife and daughter gave me a great folding chair from REI that I take with me. I could probably even get some sleep in it, but the frogs, owls and coyotes make that a little challenging. The lake was full of amorous frogs singing their hearts out looking for a mate and occasionally splashing into the water. I was there long enough to start hearing differences and even named the three most prominent crooners. For the record they were, “Barry White”, “Puppy” and “Hacker”. The names made perfect sense to me at the time…
Moon Lit Waterfall
After packing up at Rose Lake I wanted to head to the Ash Cave Fire Tower to catch the sunrise. When I got there it was only 5:30AM and dawn wouldn’t be for another hour. I decided to go around the corner to Ash Cave and see if I could capture it by moonlight. The hollow is pretty steep and heavily wooded, but there was just enough moonlight coming through the trees to do a couple long exposure shots. Fortunately there was almost no wind so the trees didn’t dissolve into a blur with the really long shutter times. Even at f/5 and ISO:200 it took a 178 second exposure to make everything visible.
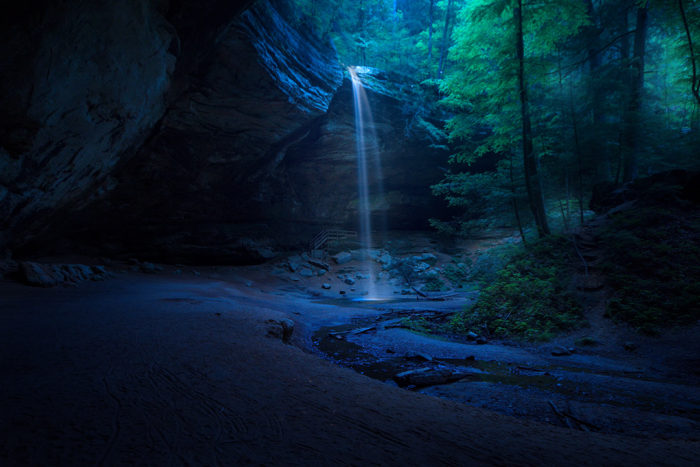
ISO:200 – f/5 – 16mm – 178 sec
Another good rule of thumb for photographers is look behind you. We get so set on our plans or expectations that we neglect the unexpected. I packed everything away then turned around to head back to the car. Oh! I got the camera and tripod back out and setup to take this shot of the moon shining through the pine trees on the Ash Cave creek. This is actually four different exposures combined in Photoshop. I also added an Orton effect to convey the sense awe I experienced standing there and seeing this unexpected beauty.
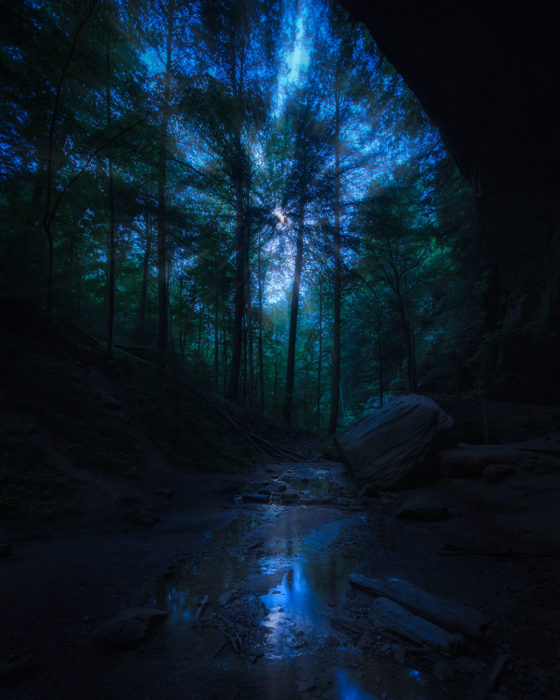
ISO:100 – f/5 – 10mm – 30 sec
If you’ve read this far, thank you. This is the longest blog post I’ve done so far. Hopefully you found it informative or at least mildly entertaining. If you’re into Milky Way photography and begrudge the moon for “ruining” clear nights, I hope this has encouraged you to give moonlight landscapes a try. If you get a cool shot and you’re on Instagram, let me know, I’d love to see it.
@sherrill_photo