Urban architecture isn’t my usual subject, but if you live near a big city then capturing the downtown skyline at least once is practically irresistible. One of the most popular views here in Columbus, Ohio is from the Rich Street Bridge over the Scioto River.
Not wanting to repeat what many have done before, I searched for a shot no one else had tried.
If you’d like a print my photos, check out my Etsy page. If you’d like a license to use my work, please contact me with usage details so I can give you a quote.
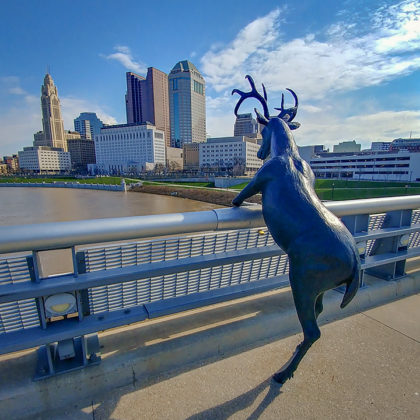
The area along the river near the bridge is called The Scioto Mile. It’s a beautiful multi-use park with trails and green spaces.
In 2015 three deer statues by artist Terry Allen were installed as part of a renovation. Why deer? ‘Scioto’ means ‘hairy deer’ in the local indigenous language. The statue on the bridge is casually leaning on the railing admiring the view of the city in a very human-like pose.
It’s a fun and unique piece that instantly identifies the city and I definitely wanted to include it in my photo.
.
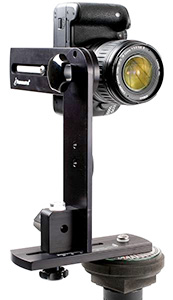 My first idea for a unique shot was to do a big nighttime panorama. By combining several photos taken with a panoramic tripod head into one big image I can create full resolution prints up to ten feet wide and five feet high. Around sunset and in to the evening, the bridge gets a lot of rush hour car and pedestrian traffic. That would make setting up an hours long shoot risky.
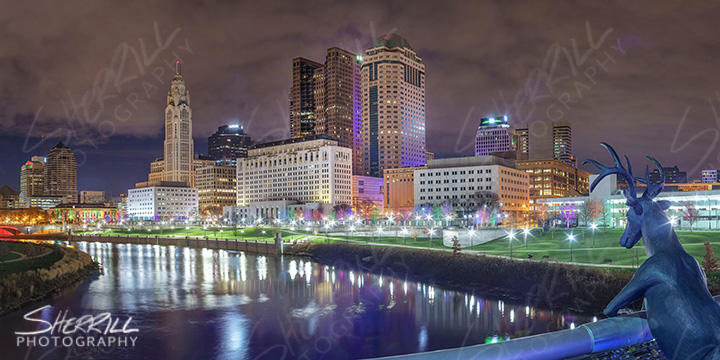
So I got up few hours before sunrise one clear December morning and headed downtown. Unfortunately the morning didn’t stay clear. Clouds moved in and changed the look of the shot. Instead of a clean, upbeat skyline, the clouds gave the panorama a moody vibe. That’s not a bad thing, but it wasn’t what I hoped for. After assembling the pano, I wasn’t crazy about the composition either. I thought including the bridge railing might add context, but it’s only partially visible and at a distracting angle. Also, the deer’s head gets a bit lost in the buildings.
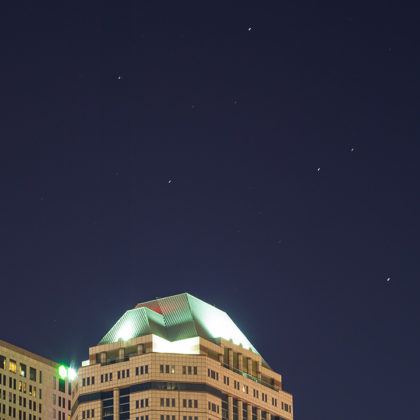
Reviewing all the photos on my computer, I noticed something in one of the first test shots – stars! Standing on the bridge in the heart of the city light pollution I could see exactly two stars. Well, actually, one star and Jupiter. But with a fast lens and a long exposure the camera was able to capture many more stars even at ISO:100. That gave me a much better idea for a unique Columbus skyline photo. Star trails!
About a week later the forecast called for perfectly clear skies all night and in to the morning. Unfortunately it also called for temperatures around 10F/-12C. So I got up about 3am, bundled up and got to the bridge about 3:45, three hours before dawn.
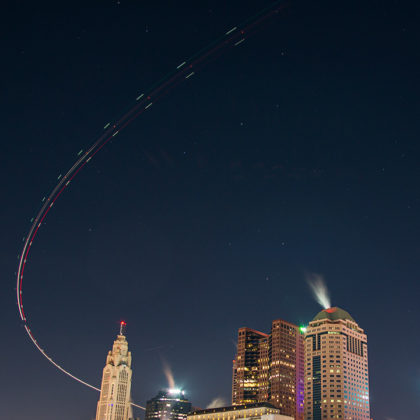
There are two ways to shoot star trails. You can either take a single 2-3 hour exposure or take a sequence of many shorter exposures and combine them in to a single image in post processing.
A single exposure gives you perfectly contiguous star trails, but one bump of the tripod and the shot is ruined. Noise from sensor heat is also a big problem with many cameras on exposures of more than 5-10 minutes. It’s also much harder to remove airplane light trails from single images.
In this case I was also sure the city lights would completely blow out to white with a single exposure.
So I opted for many shorter exposures. The first challenge was to find an exposure that captured as many stars as possible without blowing out the city lights. After some test shots, I went with ISO:100 f/4 and 20 seconds.
The next challenge was the composition. Usually, in the northern hemisphere, you want to include the north star, Polaris, in star trail photos because it’s what all the other stars appear to orbit. The one star I could see was not Polaris.

Because of my awesome ability to do geospatial trigonometry in my head, I was not only able to perfectly position the center of the star trails in the upper left corner of the frame, but I was also able to place the deer’s head in line with the galactic plane where the star trail arches diverge.
Um, ok, not really…
I knew approximately where Polaris should be relative to the skyline, but not precisely enough to base a two hour composition on it. So I chose to make the deer statue the compositional priority and setup so it was above the skyline and kind of tucked in to the shapes of the buildings. Fortunately, because I was using a lens with such a wide field of view, it worked out very well and the center of the trails fit nicely into the composition.
There was no way that in 10F/-12C weather my camera battery would last for the two hours I needed. For time lapses and star trails I use a “dummy” battery connected to a rechargeable 12V DC 6000mAh power bank. The cord on the battery is long enough that I can put my backpack under the tripod and keep the power pack inside out of the wind and cold.
Mine is a few years old, a little bulky, and has to be recharged with a wall socket. Now you can get power banks with twice the capacity that are half the weight and can be charged via USB.
You can get dummy batteries for Sony, Canon, and Nikon. Just make sure the plug matches your power pack.
Settings
The final settings were shooting RAW images in manual mode with the white balance set to a custom 3900 Kelvin, ISO:100 and a 20 second exposure. I used a Rokinon 12mm f/2 lens at f/4. The camera was in continuous shooting mode with long exposure and high ISO noise reduction off and I used a wired intervalometer with a button hold feature to take shot after shot with no delay. You still end up with tiny gaps in the star trails as the stars move between shots, but I’ll talk about what you can do to fill those gaps in post processing. I also used a Hoya Red Intensifier filter to cut some of the light pollution.
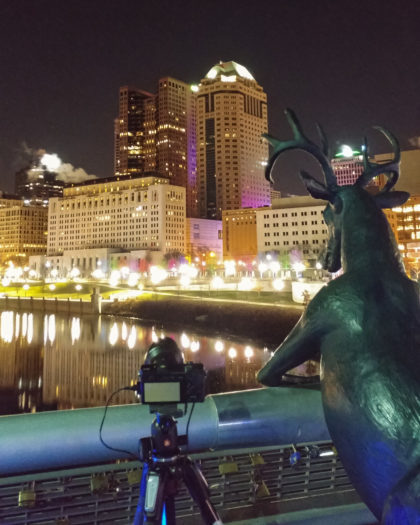 Even though I was shooting with a very wide lens, the camera was still too close to the deer statue to have both it and the skyline in focus. So before shooting the star trail sequence, I shot a bracket of exposures with the deer in focus that could be focus stacked into the final image.
Once everything was setup, I created a new folder on the SD card, clicked the intervalometer button, and paced back and forth on the bridge in the cold for two hours. Of course you have to be very careful not to disturb the tripod at all. One bump and your star trail shoot is over. There was virtually no traffic on the bridge that early, but when people started walking by I stood blocking the tripod just in case. By a little after 6am, I had 364 20 second exposures.
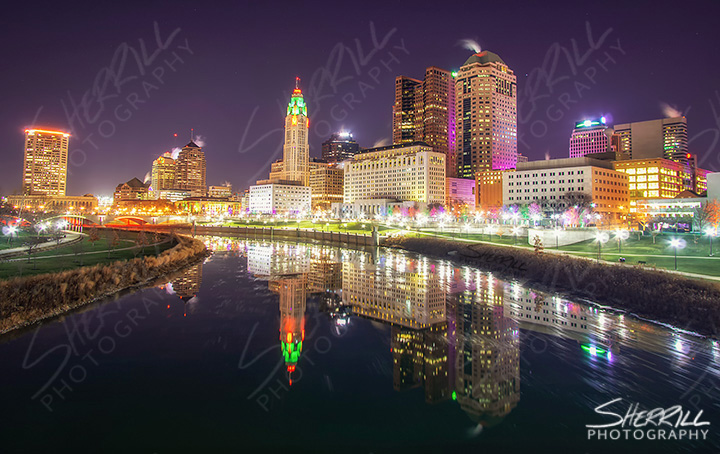
Before leaving, I switched to my 50mm lens and put the panoramic head on the tripod to take the panorama I originally wanted. I tried a few compositions with and without the deer. With the 50mm lens the deer was very blurry and that makes focus stacking more difficult. As it got closer to dawn the sky color started changing too fast for a multi-row panorama. Below is a portion of the first deerless blue hour shot I tried.
Processing
After loading all the files in to Lightroom, I edited the first frame as I would any star trail shot with the exception of a couple gradient filters. Below are the adjustments I made, but they’re what suit these images and my style. If you try a skyline star trail photo, use them as guidelines, but experiment and make it your own.
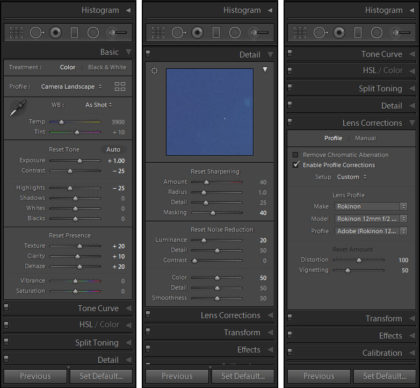
You can click the image for a better look at the settings.
In the Basic tab I increased exposure, reduced contrast and highlights, and increased Texture, Clarity, and Dehaze.
In the Detail tab I increased Sharpening Masking, Luminance Noise Reduction, and Color Noise Reduction.
Finally, In the Lens Corrections tab I enabled Profile Corrections and chose the Rokinon 12mm lens from the list.
I used three Lightroom graduated filters to recover the stars, darken the skyline, and darken the bottom of the frame. I darken the very bottom of most of my photos to give them weight and as way of keeping a viewer’s eyes from falling out of the frame.
Again, you can click the images below for a better look at the settings for each filter. I left Lightroom’s ‘Show Mask’ on so you can see what area is affected by each grad filter.
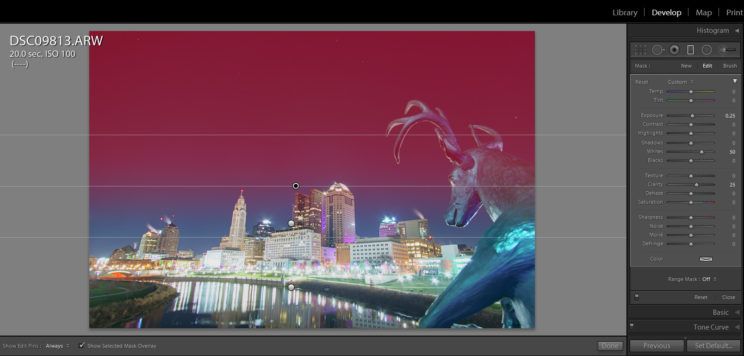
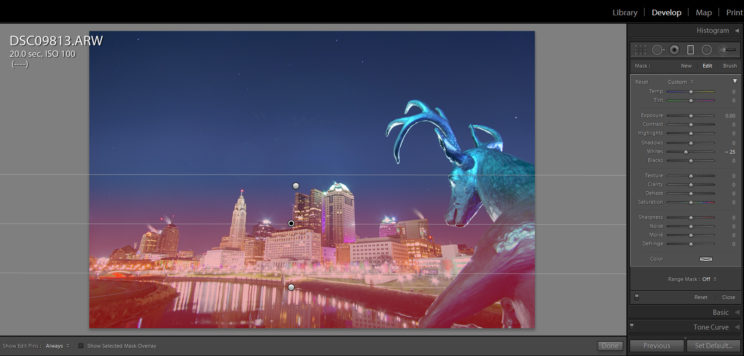
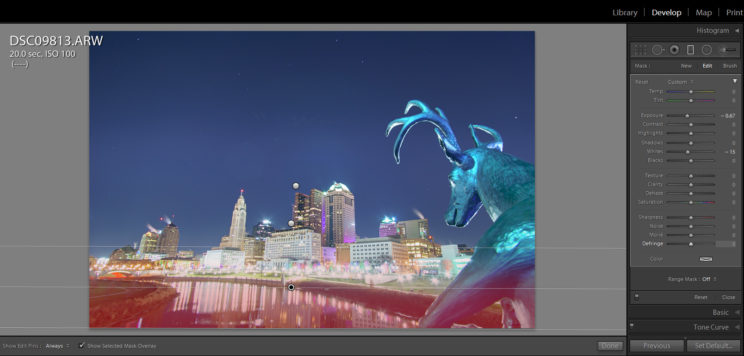
Once the basic edits are finished, and I’ve cropped to the framing I want, all of the images in the sequence are synced with the same settings and then exported to a new folder as high quality jpgs. Then comes the really tedious part – removing airplane light trails. Fortunately between 4 and 6am there weren’t many planes flying over downtown. But a couple, like the one below, came right over the city and left big trails to remove.
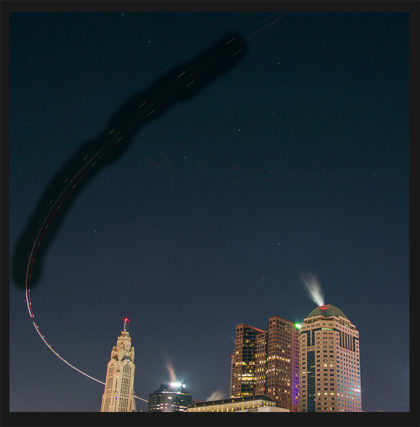
I used a quick image viewer, ACDSee, to flip through all the exported frames looking for plain trails. When I found one, I brought it into Photoshop. Because the process for combining all the frames in to a single image is additive, it only uses the brighter pixels, you can just paint over the plane trails with black. I prefer to use the spot healing brush tool because it gives a cleaner result than just black. I paint freehand over the plane trails then save the file. Out of 364 total frames there were about 60 that had to have plane trails removed. There was one frame that also caught a shooting star, but I left that in.
Because it was so cold, the steam from the buildings was especially visible. I used the same spot healing technique to remove the steam from another hundred frames.
Next I brought all the frames into StarStax a free program for Windows and Mac that combines a sequence of star trail images into a single photo. In gap filling mode, it can also, you guessed it, fill in the tiny gaps in trails.
I used gap filling mode and the default settings and when it was finished, saved the composite image as a high quality jpg. (Click to embiggen)
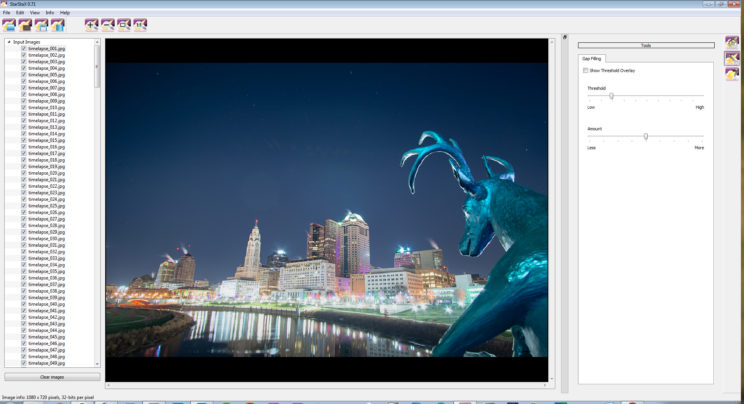
The final step was to bring the star trail composite from StarStax, a single frame of the skyline, and the shots where the deer statue is is focus in to Photoshop and use layer masks to composite them together. After some color, contrast and sharpening tweaks, I created the final image below.
If you’d like a print of this photo, check out my Etsy page. If you’d like a license to use my work, please contact me with usage details so I can give you a quote..
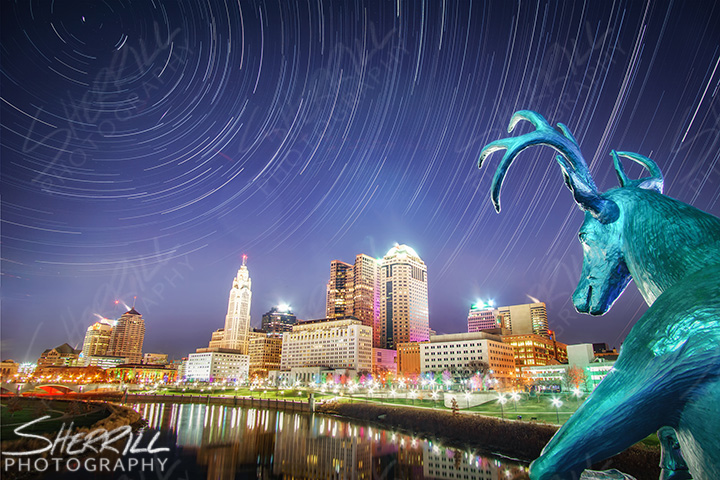
If I do this again or if you try it, there are some things to consider. An upside down soft grad neutral density filter might help tame the city lights and let you use a brighter exposure for the sky. Shooting from the green behind the COSI Museum facing east towards the skyline would give you mirrored arches of star trails instead of circles. Maybe just shooting from the other side of the deer statue would be cool too.
Thank you for reading and if you create your own skyline star trail photo, in Columbus or anywhere else, please tag me on Instagram, I’d love to see it! You can see more of my work on Instagram @sherrill_photo and more behind the scenes info on @sherrill_photo_bts.


