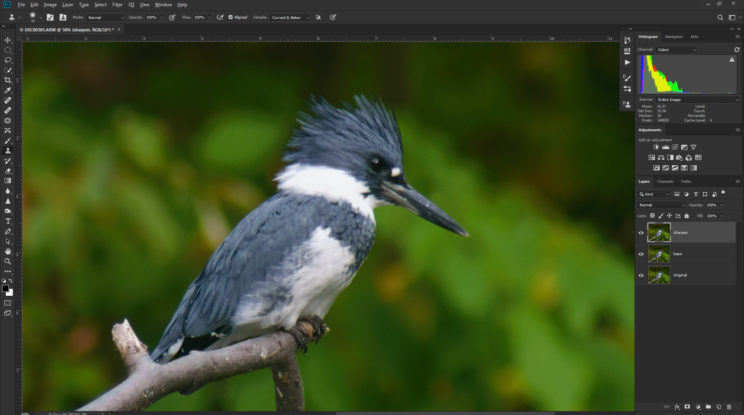
In this quick post I’m sharing with you one technique for sharpening your photos in Photoshop without adding noise. The best part is it uses filters that are built in – there are no plugins to buy.
I’ve been doing a lot of bird photography lately, but don’t own the high-end gear needed to get tack sharp photos from a million miles away. I often have to use a 1.5X teleconverter, a lens add-on that increases the range of your lens but decreases the light reaching the camera and diminishes sharpness. Most of my shots benefit from some post process sharpening, but all of the sharpening plugins I’ve tried add very noticeable noise.
This tutorial assumes you have a basic working knowledge of Photoshop. If you’re an absolute beginner, some of these directions may not make much sense.
First, develop the photo in Lightroom as you usually do. My telephoto lens has a lot of chromatic aberration at the wider apertures I use for birds. If you’re unfamiliar, chromatic aberration is the purple or green fringing you see in high contrast areas. It’s caused by some very complicated optical physics I’m not qualified to explain and you probably don’t want to hear. Fortunately Lightroom makes it easy to remove. Under the ‘Manual’ section of the Lens Correction tab, I pull the Amount slider for purple all the way to 20. If you don’t use Lightroom, you can do the same thing in the Camera Raw Filter in Photoshop.
Once you have the photo in Photoshop, make two copies of the ‘Background’ layer.
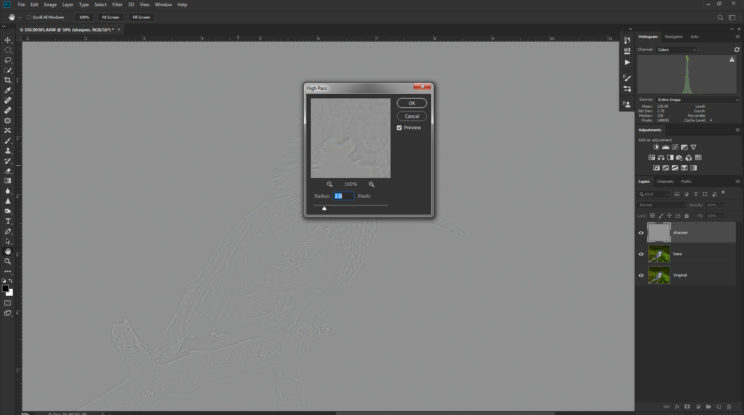
Make sure the top layer copy is selected and in the menu go to Filter > Other > High Pass. Make the radius 2.8.
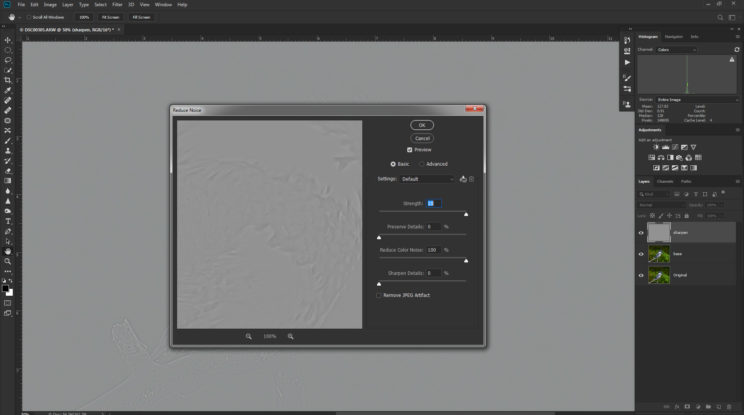
Next, with the now very gray layer still selected, go to Filter > Noise > Reduce Noise. Set the Strength to 10, Preserve Details to 0%, Reduce Color Noise to 100%, and Sharpen Details to 0%.
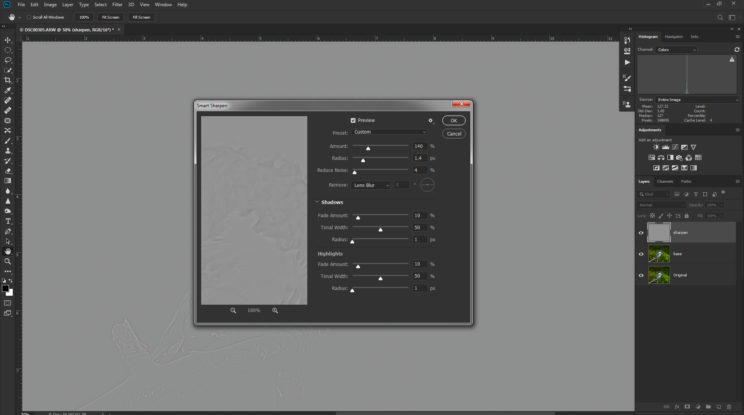
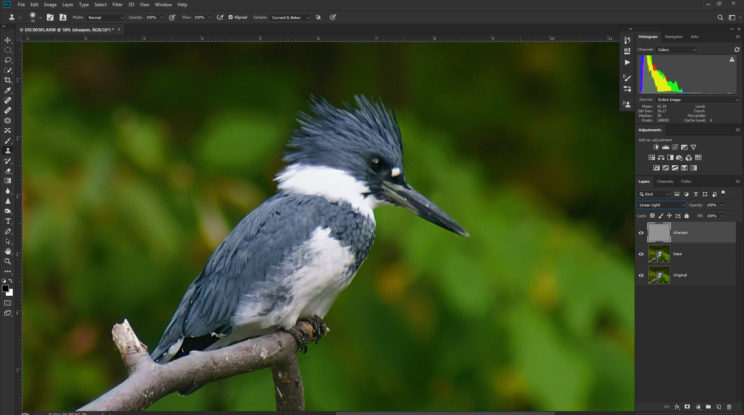
With that layer still selected, go to Filter > Sharpen > Smart Sharpen. Set Amount to 140%, Radius to 1.4, Reduce Noise to 4%, and Remove to Lens Blur.
Now set the blending mode for that layer to ‘Linear Light’ and bingo, your photo is sharpened and no new noise has been added.
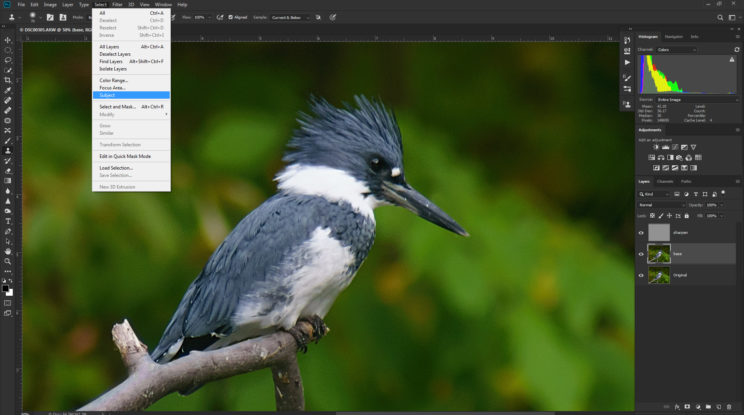
If you want the sharpening to be applied only to the subject of the photo and not the background, select the background layer and go to Select > Subject.
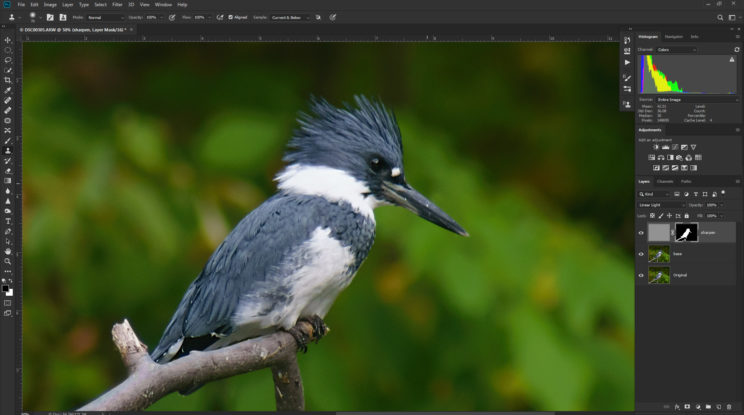
Use this selection to make a layer mask for the sharpening layer.
That is the basic technique. Give it a try. Yes, it works with more than just birds. I encourage you to experiment with the High Pass filter radius, the Reduce Noise settings, and the Smart Sharpen settings. If you have a noise reducing plugin like NIK Dfine2 or Topaz Labs DeNoise 6, you can substitute those for Photoshop’s built in noise reducer.
Hope you find that useful. You can find most of my bird photos on my Instagram – @sherrill_photo
